Taking a screenshot is one of the smallest computer skills imaginable — right up until you switch from a Mac to Windows, buy a keyboard without an obvious Print Screen key, or need to capture one tiny menu instead of your entire desktop.
That helps explain why variations of “how to screenshot on Mac” and “how to screenshot on Windows” remain enormously popular searches. The task is universal, but the shortcuts are not.
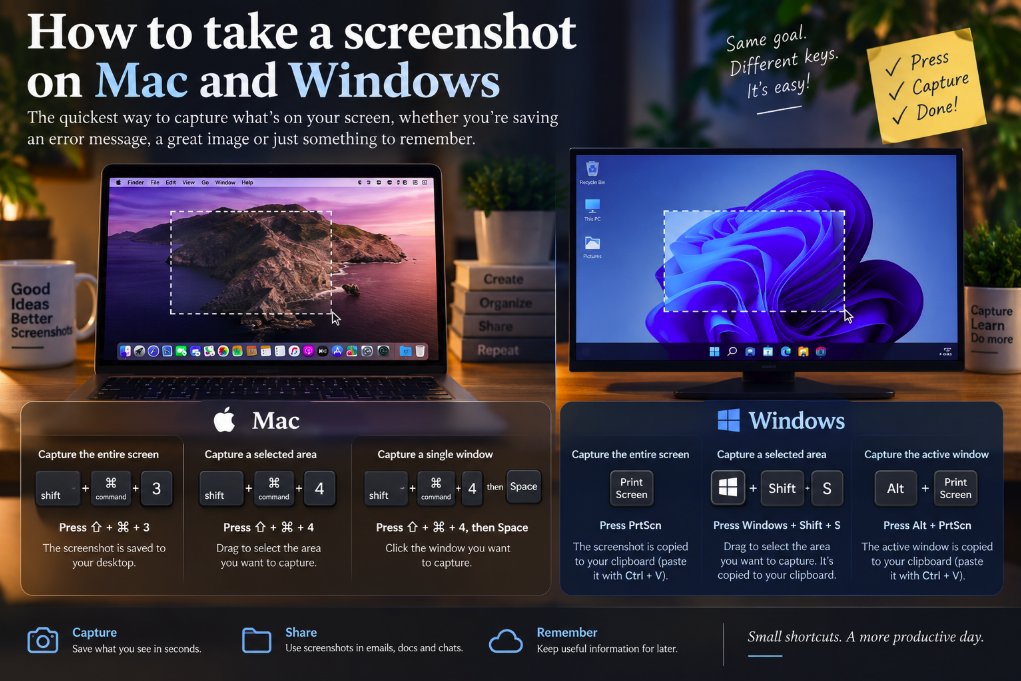
The fastest answer is easy to memorize. On a Mac, press Shift + Command + 3 for the whole screen or Shift + Command + 4 to select an area. On Windows, Windows + Shift + S is the most versatile shortcut because it opens the Snipping Tool capture overlay and lets you choose exactly what to grab.
Those shortcuts solve most situations. But both operating systems hide several useful variations — including capturing one window, copying a screenshot directly to the clipboard, choosing where files are saved and even recording part of the screen.
How to take a screenshot on a Mac
Apple builds screenshot controls directly into macOS, and the basic shortcuts work system-wide. According to Apple's current screenshot instructions, there are three combinations worth remembering.
To capture the entire screen, press Shift + Command (⌘) + 3. macOS takes the image immediately. A small thumbnail may appear temporarily in the corner; click it if you want to crop, mark up or edit the image, or simply wait for the screenshot to be saved.
To capture only part of the screen, press Shift + Command + 4. The pointer becomes a crosshair. Drag across the area you want and release the mouse or trackpad to capture it. Press Escape if you change your mind. While selecting, holding the Space bar lets you move the selection without changing its dimensions.
There is also a particularly useful trick for capturing one window or menu. Press Shift + Command + 4, then tap the Space bar. The cursor becomes a camera. Move it over the window you want and click. macOS captures that window rather than everything surrounding it. Apple notes that holding Option while clicking removes the usual window shadow from the resulting image.
For more control, press Shift + Command + 5. This opens Apple's Screenshot interface, a small toolbar containing controls for full-screen captures, individual windows, selected areas and screen recording. It also provides options such as a timer and lets you choose a save destination.
By default, Mac screenshot files are normally saved to the desktop as PNG images. If you would rather copy the screenshot to the clipboard so you can immediately paste it into a message, document or image editor, hold Control while using the normal shortcut. For example, Control + Shift + Command + 3 copies the full-screen capture rather than simply saving it as a desktop file.
How to take a screenshot on Windows
Windows offers several methods, but Windows + Shift + S is the best general-purpose shortcut to learn.
Pressing it opens the Snipping Tool overlay. The screen dims and you can choose a rectangular region, a free-form selection, a specific window or the entire screen. Microsoft confirms these modes in its current Snipping Tool documentation. After the capture, the image is available for editing, copying, saving and sharing.
Current versions of Snipping Tool can also automatically save captures to the Screenshots folder, and that behavior can be changed from the app's settings. This is useful because older Windows habits often lead people to assume that every snip exists only on the clipboard.
If you want to capture the entire screen directly to a file, press Windows + Print Screen (the key may be labeled PrtSc, PrtScn or something similar). Microsoft says the resulting image is stored in the Screenshots subfolder inside Pictures. On some laptops you may need an Fn key combination because manufacturers give the Print Screen function a secondary position.
The Print Screen key by itself is slightly more confusing because its behavior is configurable. On current Windows systems it can be set to open screen snipping; Microsoft also documents the traditional behavior in which Print Screen captures the screen to the clipboard. The setting can be changed under Windows accessibility keyboard options. So if an online guide insists that PrtSc always does exactly one thing, it may not match the configuration of the computer in front of you.
For that reason, Windows + Shift + S is usually the least ambiguous shortcut to recommend.
Where did my screenshot go?
This is often the question immediately after the screenshot itself.
On a Mac, ordinary keyboard captures are saved to the desktop by default. The filename begins with “Screenshot” and includes the date and time. Open the Shift + Command + 5 interface if you want to change where future screenshots are stored.
On Windows, captures saved with Windows + Print Screen go to Pictures > Screenshots. Current Snipping Tool versions can automatically save screenshots to the Screenshots folder as well. A capture placed on the clipboard can be pasted into another application with Ctrl + V.
Cloud-sync settings can sometimes change what users see. For example, a computer configured to synchronize image folders may make screenshots appear inside a cloud-backed Pictures directory. The essential distinction is whether your shortcut created a file or merely copied an image to the clipboard.
Can Mac and Windows record the screen too?
Yes, and the controls now sit surprisingly close to the screenshot tools.
On a Mac, Shift + Command + 5 opens controls for recording either the entire screen or a selected portion. Apple saves screen recordings as video files rather than still PNG screenshots.
On current Windows versions, Microsoft documents Windows + Shift + R as a shortcut for opening the Snipping Tool's screen-recording overlay. You can select a rectangular area and capture a video clip, which is useful for demonstrating a software problem or showing someone a sequence of steps that would require several static screenshots.
Screenshot and screen-recording restrictions can still exist inside certain applications, especially when protected media or security-sensitive content is involved. If a shortcut produces a black image or refuses to capture a particular window, the application may deliberately be blocking capture.
The four shortcuts worth remembering
You do not need to memorize every combination. For most people, four cover almost everything: Shift + Command + 3 for the whole Mac screen, Shift + Command + 4 for a Mac selection, Windows + Shift + S for flexible Windows captures, and Windows + Print Screen when you want a Windows full-screen image saved directly as a file.
The rest are conveniences. Shift + Command + 5 turns the Mac shortcut into a complete capture control center. Adding Space after Shift + Command + 4 neatly isolates one Mac window. Windows Snipping Tool adds annotation, delayed captures and multiple selection modes.
It is a tiny example of a larger truth about personal technology: the simplest actions become effortless only after the right shortcut enters muscle memory. Once these do, taking a screenshot stops being something you search for — and becomes something your fingers simply know.